At the recent Southwest Computer Conference, I attended a workshop presented by Debbie Jones of the Monterey Bay PC Users Group. Debbie also does training in various topics. Her firm is called Anything is Possible. The workshop topic was Microsoft Word 2007 Tips & Tricks.
Here is my take on a couple of the tips that I thought would be of general interest.
Formatting Pictures
When you insert a picture in Word 2007, you have number of options that may not have existed in earlier versions.
You not only can do some basic resizing and cropping, you can also change brightness, contrast and color. You can also add borders and apply different effects, such as shadows, glow and more. You can also make the picture fit into a special shape.
To format a picture, select the picture, then find the Picture Tools. The “Picture Tools” will appear above the usual toolbar.

From there, you can do a number of things with the image. Here is one example: By clicking on the tiny down arrow next to “Picture Shape”, I can “insert” the picture into a pre-formatted shape. This was an ordinary retangular photo and I applied this shape to it.


Play with the Picture Tools to achieve different effects and to do a quick edit of your picture.
Easy Zooming
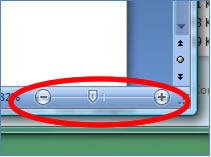 If you have a document on the screen and you can’t quite read the text—zoom in.
In the lower right corner, there is a slider that allows you to increase the size of the document you have open.
It is the equivalent of using the Zoom dialog in the View Menu. By the way, this works in Excel and other Office applications.
The Quick Access Toolbar
In a default installation, there are icons in the quick access toolbar at the top for saving files, undoing and re-doing.
You can add icons to the toolbar for things that you do frequently. Go to the Office button up in the left hand corner and at the bottom, click on the button for Word Options.
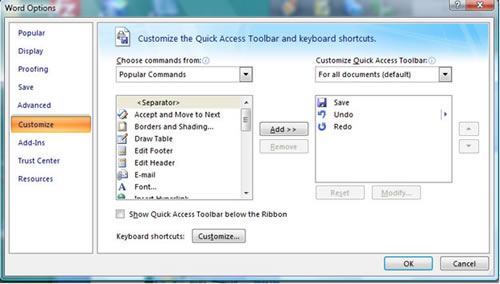
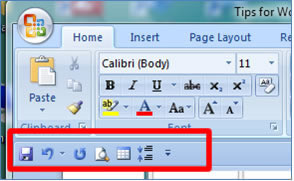
Select “Customize” to see the options for the Quick Access toolbar. Choose the commands you want to add from the dropdowns. If you want to move the toolbar to below the Ribbon, check the box near the bottom.
Notice that the Quick Access toolbar is now below the Ribbon and has additional functions in it.
Pinning Files to the Recent Documents list.
Clicking on the Office button takes you to a menu as shown in the screenshot below that includes the list of your recent documents..
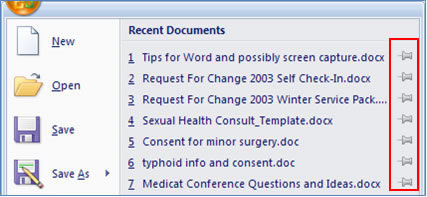 Notice the little “pushpin” icon on the right side of the names of files in the Recent Documents list.
If you click on the pushpin, the file will remain in the same position on the list. This is good when you are working on the same document over a period of time and need to go back and forth multiple times. This works in Excel also.
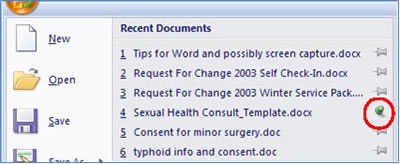
Notice that the pushpin turns green and appears to be “stuck” in the list after you click it. To return the file to the normal behavior, click on the pushpin again. This works in other Office applications as well.


